How to Fix a Sagging Door
Several factors can cause your door to sag. These factors include humidity, weather conditions, and the weight of your door. Fixing a sagging door is an easy DIY project that will save you money in the long run by preventing damage to other parts of the house or even injury from falling objects.
You don’t need any special tools or equipment to repair a sagging door. All you’ll need are some basic household items like wood glue and tape measures. With these materials on hand, you can follow these simple instructions for fixing a sagging door in no time at all.
Gather Your Tools and Materials
Your basic household tools and a tape measure will help you fix your sagging door. To correct any sag in the bottom of the door, you’ll need a carpenter’s level, wood glue, a drill with a small bit, a cordless screwdriver, or a power drill.
You’ll also need measuring tape for inside measurements and outside measurements, 2’x2′ wooden boards cut to fit the length and width of your door, wood screws, a hammer or drill driver for driving in the screws, belt sander, and protective glasses.
ccess the Problem
Check your door from all angles of the hinges on your door to see if it’s sagging. Take the time to measure the outside of the door and then take measurements inside. You’ll need both sets of measurements for making accurate repairs.
It’s very common for sagging doors to have a gap between the door and the outer tracks, which can cause leaks that will rot your wooden door. If you notice extra space at the top or bottom of the doors when closed, it may indicate an issue with sagging.
Check if the Door and the Frame are Levels
The simplest way to see if the door is level is to lay a 2×4 across two studs and close the door onto it. If the board doesn’t move, then your door hinges are likely fine. However, if you notice that there is a gap at either end of this measuring device, then your door is likely sagging.
Examine and Tighten the Hinge Screws
You are looking for screws that are either too tight or too loose. If the screws are tightened, then you will likely need to replace the hinge. Hinge bolts should be checked annually for correct tightness. Use a screwdriver and not a cordless drill. Tighten the screws to the point that they are secure but not any tighter, which could strip out the screw hole.
Find and Fill the Stripped Holes
If you find stripped holes, you will need to fill them with a toothpick and a carpenter’s glue. Allow the holes to dry for one full day before screwing in new hinges or adjusting the door to secure it. But first, remove the hinge with the stripped hole by removing screws with a screwdriver. Make sure you remove it from the door jamb and frame and, if possible, from the door’s face.
Once the glue has dried, screw the hinge back into place. Make sure that it is flush with the door’s face and is secure. Putty knives are great for this. After that, pre-drill the hole then replace the hinge and its screws.
Replace the Shorter Screws with Longer Ones
If you have some long screws that are just as thick as the stripped screw, steal them from another piece of furniture. It is a quick and easy fix to give your door some extra length for new screws to settle into. If the new screws don’t fit in the stripped holes, first sand them down to fit. Remove the short screw from the top hinge because if it’s not 2 1/2 to 3 inches long, it won’t reach the wall stud behind the drywall.
Before replacing the longer ones, ensure you remove old screws and pre-drill them into the jamb and wall stud. Check your door level after replacement, and when your longer screw touches the wall stud, the door is level.
ttach Shims Between the Hinge and the Door Jamb
This is another method that can add some height inside the door jamb for new screws to grip into. Try to align the hinge and the door by making shims with thin pieces of cardboard, wood, or playing cards and fitting them between the hinge and the jamb. Add these materials to the mortise little by little until it becomes sufficient enough for a new screw to grip into.
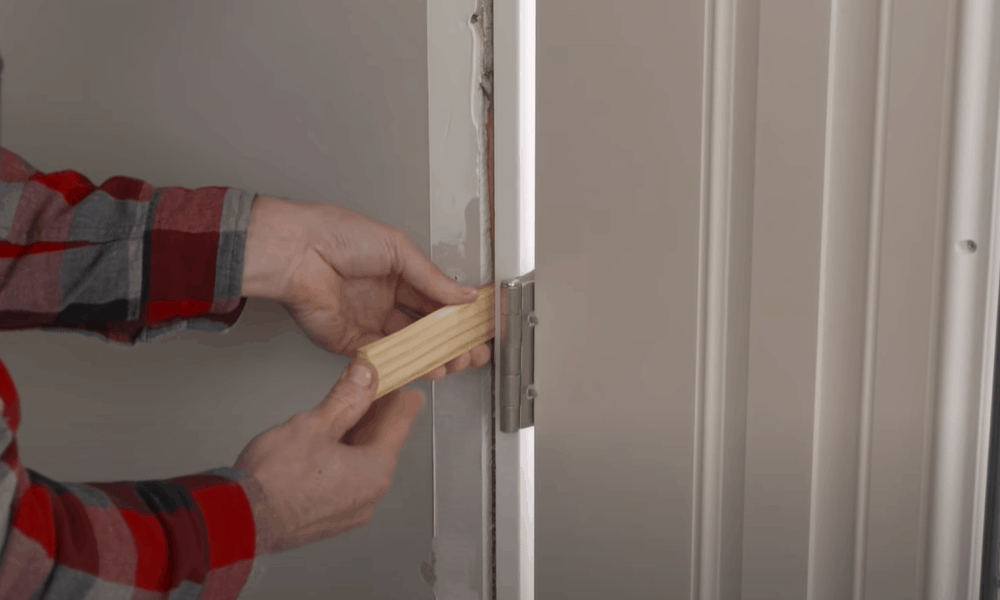
Image caption: https://www.wcmanet.org/
Replace Hinge Screw with 3 Inch Screw
The most effective way to fix a sagging door is to replace one of the top hinge screws with a 3-inch long screw. This not only pulls the hinge closer to the door jamb but also draws the entire door frame’s wooden components together. Remove all the three screws from the hinge and replace the screw in the center with a 3-inch long screw.
Drill pilot holes through the hinges and door frame before inserting screws into these places. Put the hinge back on and insert screws until they are tight.
Plane Your Door with Belt Sander
Some doors are not sagging because of the hinges but due to other reasons. Fixing hinges is only half the job done if the problem lies elsewhere. To fix a too-high door, use a belt sander to sand down your existing bottom hinge’s screw head or replace them with one-inch long screws.
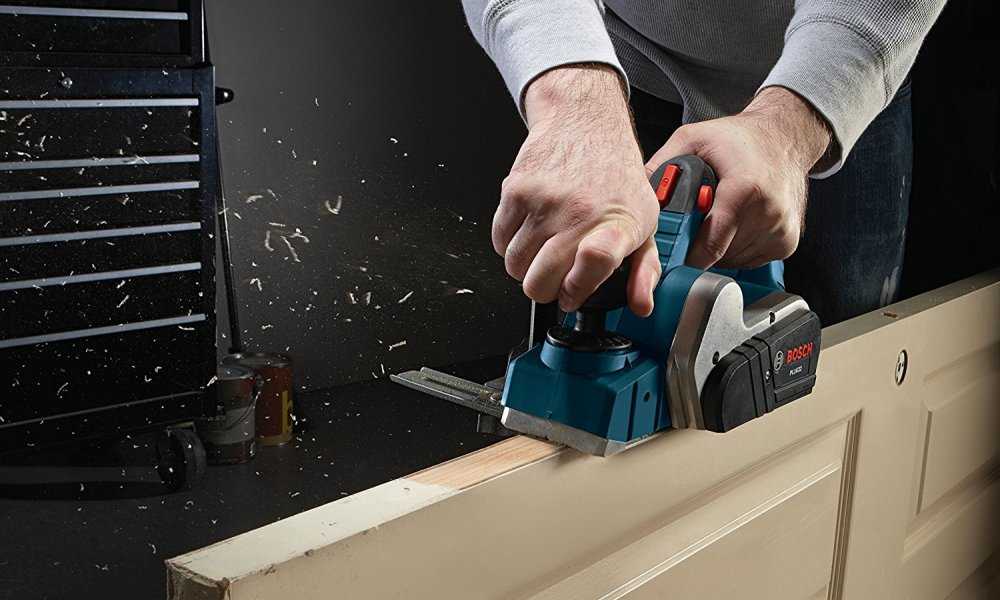
Image caption: https://mk0woodworkologygqje.kinstacdn.com/
If your door is still sticking after you’ve tightened and replaced the hinges and screws, then it’s possible that your door is warped due to weather damage or other reasons. In that case, remove your door and plane it. You can also check if your door is misaligned and learn how to fixed a misaligned door
Sand the Scribed Edge
Scribed edges are also important because they help ensure that your door will close and fit well. To fix a scribe edge with your belt sander, pull the sander towards you to remove excess wood. This is different from how you use an orbital sander which requires you to push away from yourself. Use your hand to sand the top edge of your door. Sand the top or bottom edge where the door sticks. While sanding, make sure you don’t create a bevelled edge.
Straighten the Door
After sanding, straighten the door on a level surface to ensure that it still closes and fits well after you’ve finished. Place a small bead of glue on the inside bottom edge of each side of your door. Place a pin nailed against each corner on both sides and use just one or two nails to secure the glue in place.
Install a New Hinge Pin
Pick up a new door hinge pin and place it on the top or bottom of your door. Use a hammer to tap this in so that it sits flush with the surface. Again, you don’t want to create a bevelled edge. Indeed, old hinges will naturally loosen over time, and metal rubs against metal to create a little bit of friction, but there’s no reason you can’t tighten up the hinge with a touch with a little help from your trusty hammer.
If you find hinges that match your door’s other hinges, then replace the entire hinge. You may also decide to replace all three hinges with a different style of hinge. Do this by removing the existing hinges and using your drill to remove any old screws.
Repaint the Smoothened Edge
After planning and sanding your door, you may opt to refinish with a repaint. Make you repaint after you’re done with sanding. Repainting your door won’t only bring uniformity with other edges but also put an additional layer of paint to protect the smoothened edge. Sanding also helps you see any dents or imperfections, so you can touch up chips with a bit of paint before applying the final coat.
FAQs on Fixing a Sagging Door
What causes a sagging door?
There are a number of reasons for your door to sag. The most common causes include:
• A structural problem with the frame or subfloor• Too many layers of paint on the bottom of the door• Old, dry and loose hinges that aren’t holding up the weight of the door• Improperly hung spring-loaded hingesUneven flooring, which you can fix by learning how to level a floor first
Final Thoughts on How to Fix a Sagging Door and Preventing Future Damage
If you follow the steps outlined above, you should be able to make your door much smoother and easier to open and close. You can also try these tips for freeing up a sticky garage door or unlocking a bathroom door. When your door starts sticking again, you’ll know exactly how to fix it quickly and easily. If the problem persists, it’s time to call a garage door professional.
The post How to Fix a Sagging Door appeared first on Kitchen Infinity.
Did you miss our previous article…
https://www.ilovethelovekitchen.com/?p=188
![13 Top Manufacturers of Luxury Vinyl [LV] Flooring](https://www.ilovethelovekitchen.com/wp-content/uploads/2021/12/Vinylwoodfloor-GettyImages-1086734442-54734c8c0a9a40f681ce97fa7deac657-1-800x450.jpg)