How to Bend Wood
Bending wood is a delicate process that requires special tools, time, and patience to complete. Although bending wood around corners or joints is difficult because it weakens the board’s structural integrity, this doesn’t mean you can’t bend wood in these areas.
Woodworking projects often require boards bent into different shapes such as curves and angles. This can be accomplished by using simple bending techniques with basic hand tools. Follow these steps for how to bend wood around corners and at joints correctly, so your project stays strong and beautiful without any damage to the material or structure of your piece.
With a few simple steps, you’ll learn how to properly bend wooden boards without damaging their shape or strength during construction on most carpentry projects, including furniture, wine bottle holders, and more.
Bending wood is a two-step process. These processes include softening the wood through steaming and creating several cuts on the back of the wood through kerf cutting.
Bending Wood with Steam
The first step in the process of how to bend wood is steaming. You can either do this using a commercial steam box or use a large pot with a lid, properly ventilated for airflow. You first soak the wood in water to make sure that it is moist. You then place the three in the steam box or pot and close with a lid to trap heat in.
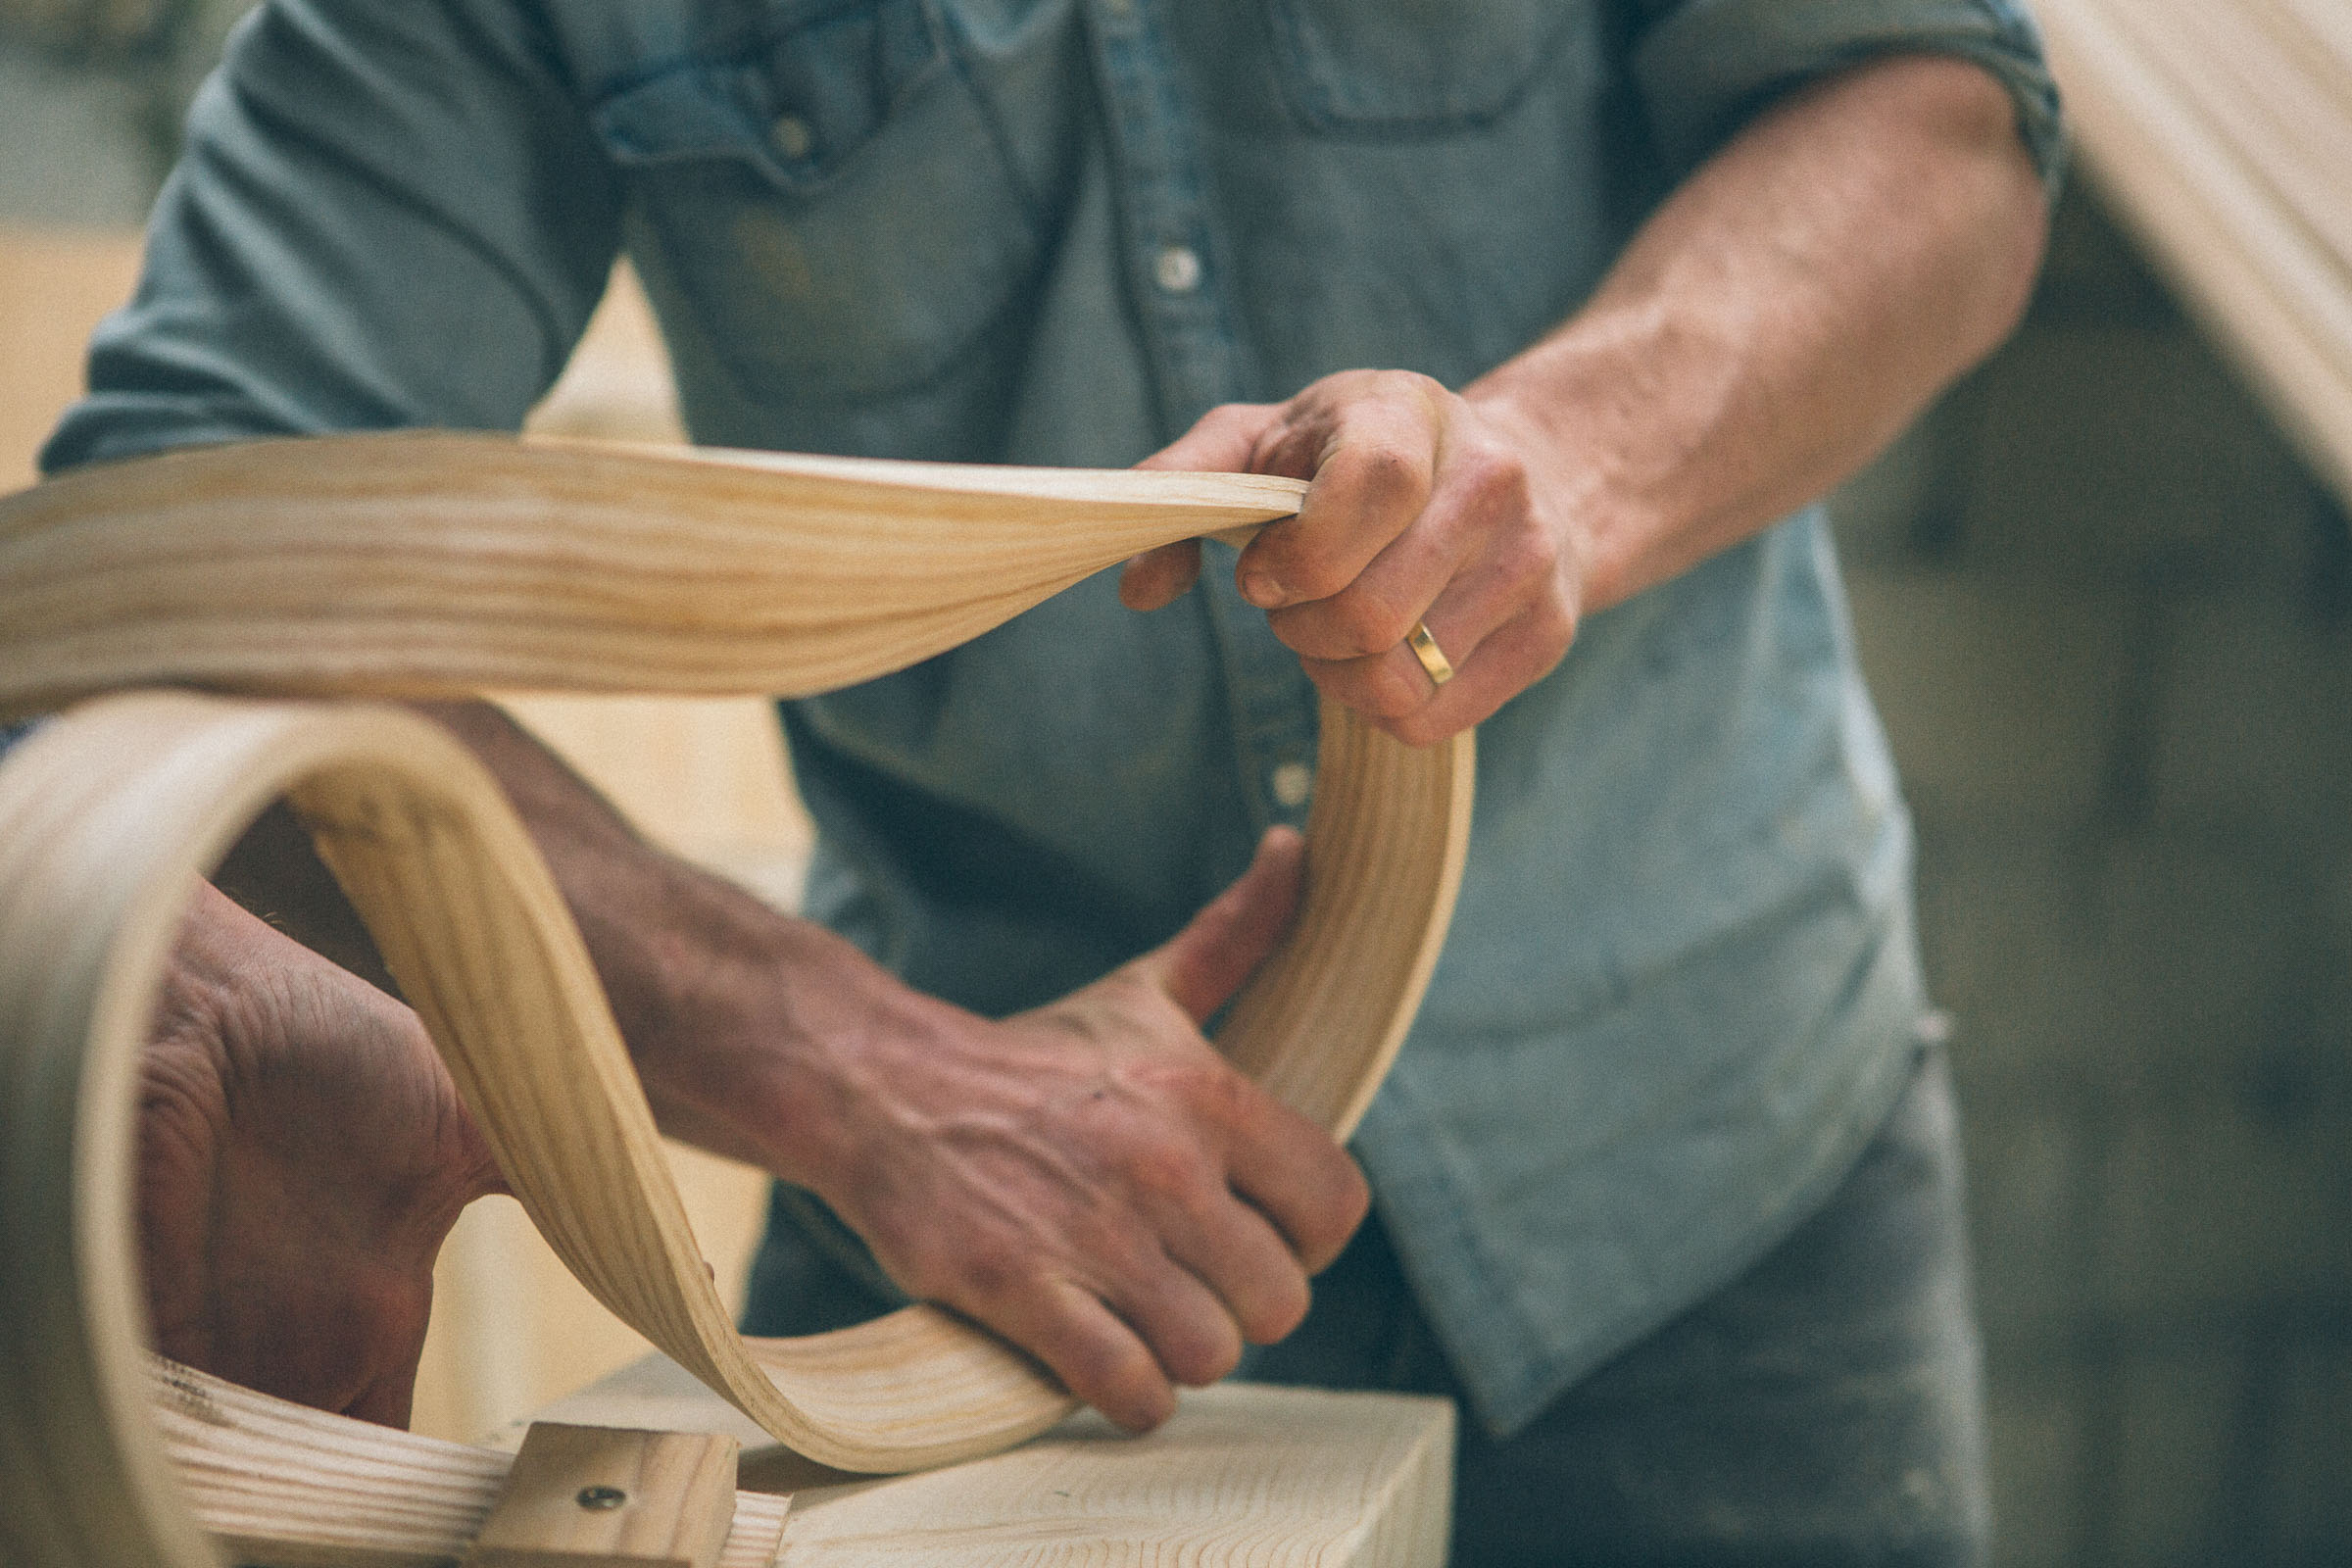
Image caption: https://cdn.shopify.com/
In order to keep your wooden bent part in the desired shape, you should apply clamps. You can make clamps out of other materials, but it is recommended that you use steel or other metals as they will not compress the wood over time.
Now it’s time to steam your wood. Make sure you take care of the heat source and your steam production. Test the temperature by sprinkling water onto your heated surface; it should produce enough steam to make the wood damp but not wet.
Bending should be done in the direction of the wood grain. Wood grain is the direction of wood fibers in the trunk of a tree. Wood is often cut along the grain in furniture making; this reduces splitting when force is applied to it by screws or nails.
So, if you have solid wood in front of you and notice a horizontal line and not the diagonal line, then that’s the direction of the wood grain.
Best Types of Wood Steam Bending
Steam bending works well with thin and small types of wood. Sheet materials are not suitable for steam bending because of their size. Types of wood that you can steam bend include red oak, white oak, and hackberry. Wood varieties such as soft maple, yellow poplar, and hard maple are even contraindicated for bending because they are too hard.
How to Bend Wood With Steam
What You’ll Need
Steam sourceScrewdriverWoodSpring clampsUtility knifeHeavy glovesEye protectionCordless drillFour-inch rubber gasketTwo-inch hoseFour-inch PVC sewer pipeFour-inch sewer pipe solid cap
Step 1: Build Your Steam Box
Your steam box can be a wooden box, or it can be a piece of PVC pipe. The important factor is that both pieces of pipe should fit tightly inside the box or other steam chamber and should not rattle when you shake the box. If they do rattle, add rubber spacers between them at their point of contact with one another.
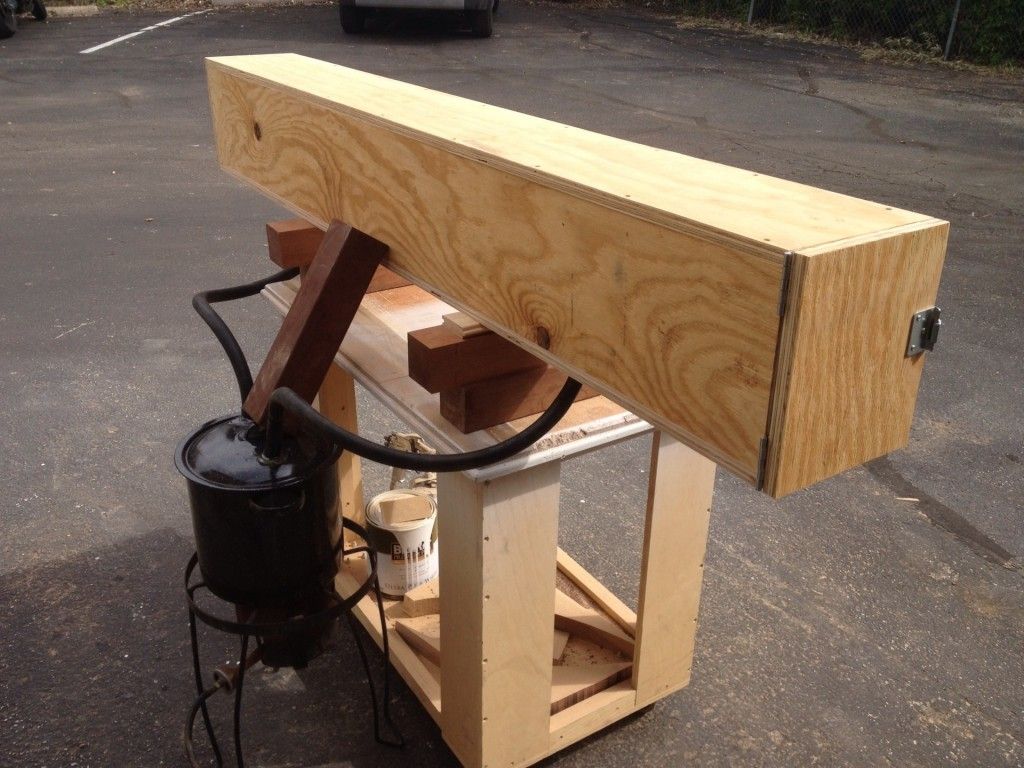
Image caption: https://i.pinimg.com/
Once your wooden box is together, drill a hole in the lid large enough for the spout of your rubber gasket. For the best result, set up your exit hole so that it is very close to the edge of the box when you hang the lid.
Step 2: Prepare Your Steam Box
Remove the rubber gasket and place the steam box in areas such as your garage or outdoors. This will prevent your flooring from being damaged by excess moisture. Put your boards bent in a sawhorse-type construction at a height allowing you to easily work on them. Get some wood clamps and place them across the boards. The more planks you have in your stack, the slower they will bend due to their moistures expanding at varying rates.
Step 3: Build the Frame
As your wood dries, create a frame for it using some 2 x 4’s. Keep them about an inch or two apart from each other, and attach them on all sides of your wood planks with metal screws. This will help the boards retain their new shape once they are dry. You can use plywood, lumber, and clamps on a woodworking bench to create the frame.
Step 4: Prepare to Steam
Place a bowl in the bottom of your steam box, add water to it. For every inch of wood, you’ll need about one gallon of water. Add a cup of vinegar to the mix-this will help your boards absorb more moisture and ensure they bend easily. Use a drill to punch some holes in the sidewalls before adding your wet planks to them.
Step 5: Bend Your Wood
Turn on your heat source and bring it to the maximum. You can test that it’s hot enough by placing your hand a few inches above the bottom of the steam box. If you cannot keep your hand there for more than five seconds, it is ready. On average, you should steam wood for about one hour per inch of the desired thickness.
Step 6: Remove Your Wood and Let it Dry
Use thick gloves and plywood tongs to handle your boards as they come out of the steamer. Place them on some thick, dry pieces of wood and let them dry completely. Make sure you overbend them by five percent because they’ll tend to bend back to their original shape as they dry.
Bending Wood by Kerf Cutting
This wood bending method requires no soaking or steaming and no waiting time. You can create multiple incisions in the back of the wood by cutting thin strips which will not be seen. When the wood dries, it will bend easily even though it is very hard and dry.
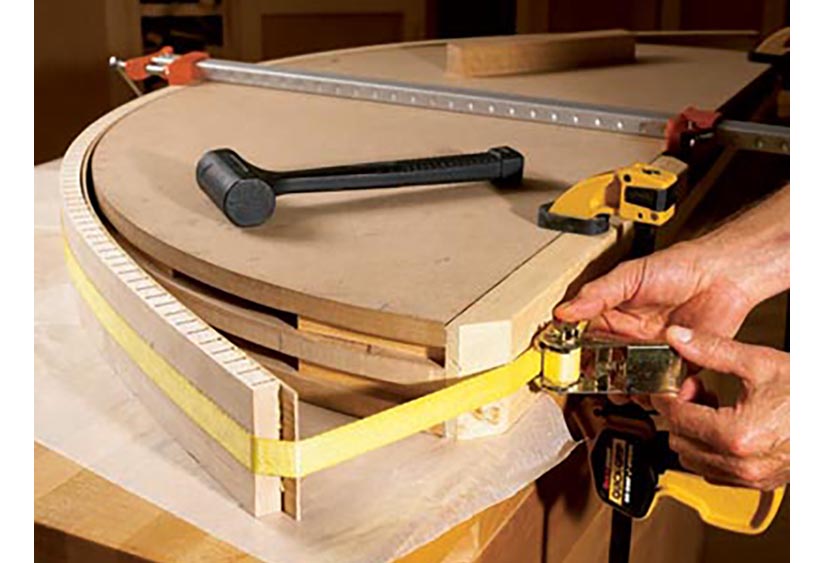
Image caption: https://static.woodmagazine.com/
For kerf cutting, almost any type of wood can be used. You only need to bend the wood parallel to the kerfs. Be careful to bend your wood slowly to avoid cracking. However, the kerf cut method should never be considered for structural parts because the kerf cut can structurally weaken your wood, resulting in failure.
What You’ll Need
Kerf saw bladePencilWoodWood glueMiter saw table saw and radial sawEye and hearing protection
Instructions
Prepare Your Wood
Image credit:http://cdn.shopify.com/s/files/1/0561/8961/6313/articles/wood.jpg?v=1628573771
Measure and mark your wood 1/2 inch from the end. Then make a cut on the marks you’ve made and set it aside for later use. Using your miter saw, table saw, or radial arm saw, find the kerf blade that fits the tool you’re using and measure to see if it will fit.
To determine the angle of how much you need to cut, measure the width or thickness of your wood and divide it by two. Remember that the kerfs are located inside the curve you’re trying to fashion, so be very careful because deep kerfs can break the wood.
Mark the Range of Cuts
Use a pencil or painter’s tape to mark the span of the bend you’ll be creating. But you can as well skip using these tools if you’re going to bend the entire material.
Make Your First Cut
Turn on your saw and run and run the blade across your solid wood. Begin at one end of the bend span. Continue making additional cuts as you maintain a distance equaling the width of the saw blade. Continue cutting until you reach the end of the bend span.
Bend Your Wood
You can bend your kerf cut wood by installing it in its eventual installation. For example, you can install a bent wood in a bench leg, in a chair back, or maybe you can add a decorative touch to any furnishing.
You can also use your bending saw blade for this task if you have one installed in your machine. Fit the blade into your table slot and adjust it to fit comfortably in the kerf cut. Press down on the handle of the wood while drawing the wood towards you. Press against it while you push away for a more pronounced curve.
You can also fill the kerfs with wood glue by bending wood into a frame and leaving the glue to dry. This works best for outward wood curves and not inward curves. For inward curves, use a supporting frame to hold the curve in place while the glue dries.
The frame should be made of wood that matches your project, so it isn’t very noticeable. Cut a frame to fit inside your bend and secure it with nails or screws from the outside of your bend to keep everything together while the glue dries.
Fix the Bend
If you get a slight bend in your wood and it isn’t noticeable, leave it. However, if you get a large or very noticeable bend in your wood when there is no way to straighten it properly without breaking the board, try fixing the problem with screws. Drill holes through each piece of bent wood where they are touching each other.
You can also fix the bend by facing the front side of the wood by veneering or laminating. Apart from fixing, setting, or bending your wood, this process will also hide any cuts you make while fixing it. You can also use this when learning how to distress wood
FAQS on How Bend Wood
What is the best wood for bending?
The best wood for bending is the plastic ones, which are deciduous wood species. They include birch, oak, beech, hornbeam, maple, linden, and ash bend wood.
How long do you have to soak wood before bending it?
While most people like soaking their wood for about 2 hours, some soak it for up to 24 hours. You may not be able to bend the wood if you do not lengthen the time.
Is there any special tool needed when bending wood?
Yes, a jig is usually used in bending woods. A clamp can also be of help.
Final Thought on How to Bend Wood
As you can see, bending wood requires different techniques and working materials. So, you have to familiarize yourself with these materials and techniques before you start your woodworking outdoor project. Also, which wood bending method to use depends on the type of wood, the thickness of the wood, and the desired angle you are going for.
The post How to Bend Wood appeared first on Kitchen Infinity.
Did you miss our previous article…
https://www.ilovethelovekitchen.com/?p=303